Your Apple ID, soon to be known as your Apple Account, is crucial for seamless cross-device functionality. Updating it is simple if you own an Apple device with internet access, although certain security settings may cause a brief delay.
How to Change Your Apple ID Email
Basic Steps:
- Open the Settings App:
- Navigate to your iPhone or iPad's Settings app.
- Tap on Your Name:
- This will open your Apple ID settings.
- Tap on Sign-In & Security:
- Edit Email & Phone Numbers:
- Tap the Edit button next to Email & Phone Numbers.
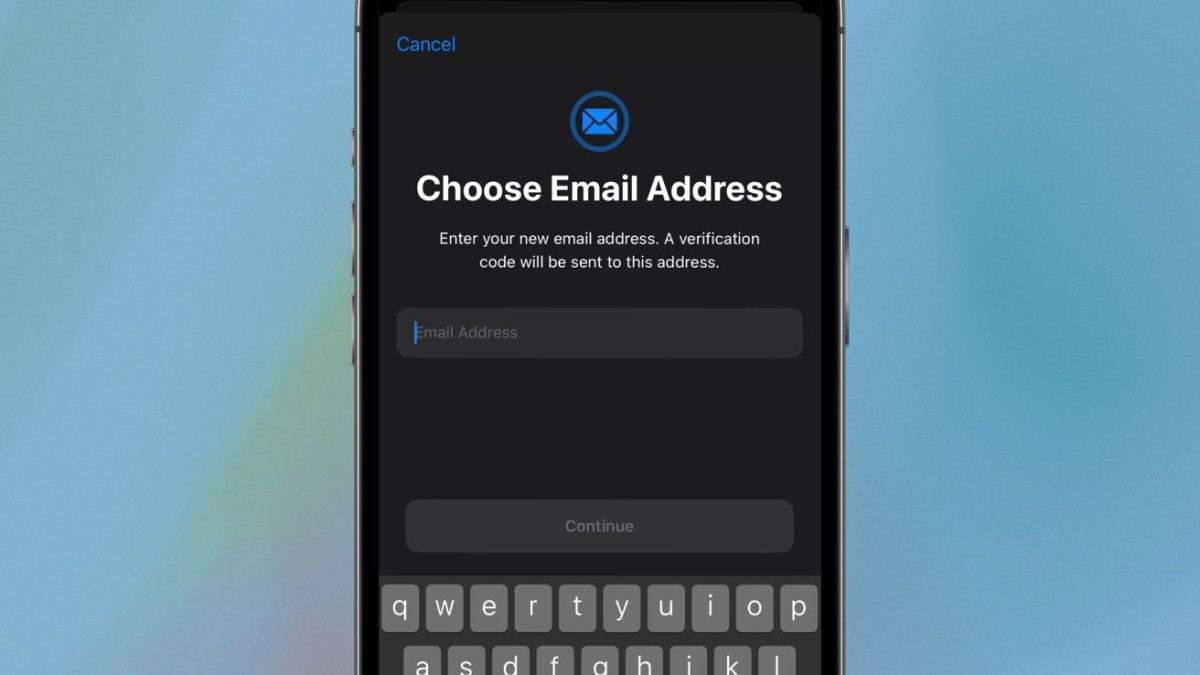
- Delete Your Current Apple ID Email:
- Choose and Enter Your New Apple ID Email:
After entering your new email, you will need to verify it. Apple will send a verification link to your new email address. Open the link to complete the verification process. This can also be done through Apple’s website, following similar steps.
How to Change Your Apple ID Email with Stolen Device Protection Enabled
If you have Stolen Device Protection enabled, the process will differ slightly. You cannot change your Apple ID email on the web and must do it directly from your device.
Steps with Stolen Device Protection:
- Open the Settings App:
- Navigate to your iPhone's Settings app.
- Tap on Your Name:
- This will open your Apple ID settings.
- Tap on Sign-In & Security:
- Edit Email & Phone Numbers:
- Tap the Edit button next to Email & Phone Numbers.
- Delete Your Current Apple ID Email:
- Start Security Delay:
- Your device will initiate a security delay if you’re not in a familiar location or have a delay setting.
Your iPhone will notify you once the delay ends. You will have an hour to make the change, or else you'll need to restart the process.
Conclusion
Changing your Apple ID email is not difficult, but be prepared for a potential delay if Stolen Device Protection is enabled. Ensure you're ready to complete the process within the given time frame to avoid restarting the security delay.